
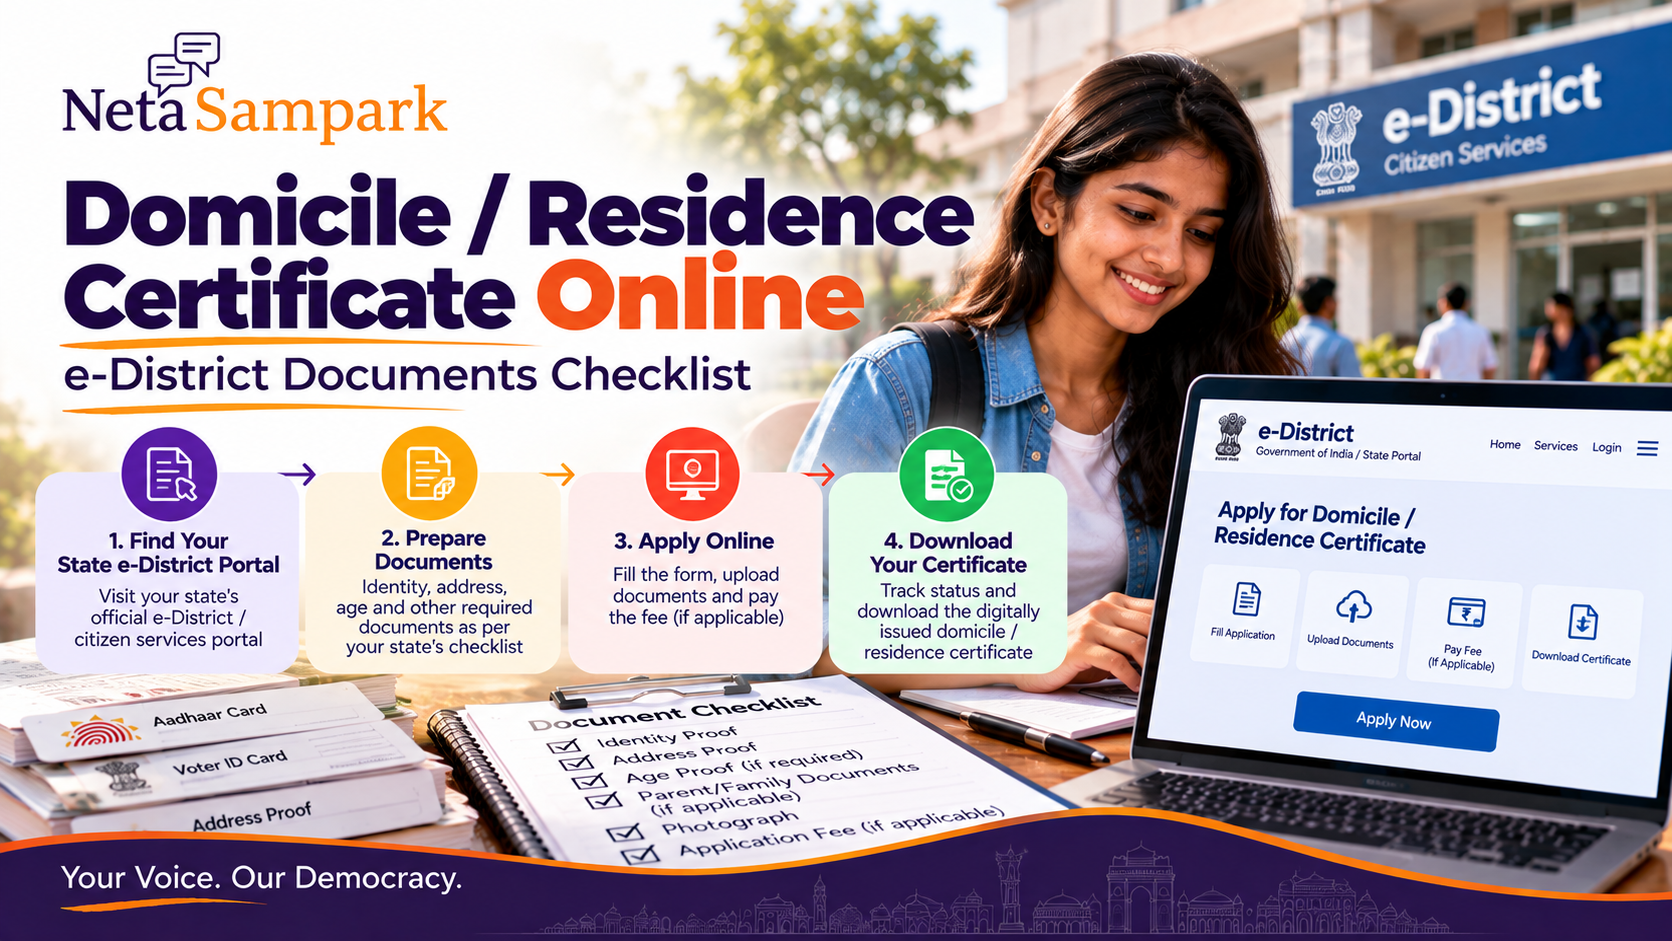
Quick take: A domicile / residence certificate is a state-issued document used to establish that you meet that state's residence or domicile requirements. It can be relevant for state-quota education, government recruitment, scholarships, welfare benefits and other state-specific services. The application route and evidence requirements are not uniform across India: states use different e-District/e-Seva systems and may call the document Domicile Certificate, Residence Certificate, Nativity Certificate or a similar name. (India.gov.in)
This is a document-preparation + online application checklist. It is not a guide to changing your permanent address or proving citizenship.
First: residence certificate ≠ every address proof
A utility bill, Aadhaar, rental agreement or voter ID can show an address.
A domicile/residence certificate is different: it is an official certificate issued under the applicable state rules to establish the residence/domicile status required for a particular purpose.
For example, Delhi's official e-District FAQ describes domicile certification as relevant to educational seats, some recruitment preferences and other institutional requirements. (eDistrict Delhi)
So if a college or recruitment notification says:
“Valid domicile/residence certificate required”
don't assume that uploading Aadhaar alone satisfies the requirement.
Where do you apply?
There is no single nationwide e-District portal for every state.
Depending on where you live, the service may be available through:
- State e-District portal
- State citizen-service portal
- Revenue Department portal
- e-Seva / ServicePlus
- CSC / authorised service centre
- District or sub-district administration
The National Government Services Portal lists separate domicile/residence services for multiple states and Union Territories, confirming that the route varies by jurisdiction. (India.gov.in)
Before searching Google
Start with the National Government Services Portal or your state government's official website.
Avoid sponsored pages offering:
“Instant domicile certificate — ₹499”
You normally don't need a private intermediary merely to find the government application page.
Domicile vs residence vs nativity
Don't assume these terms are interchangeable.
A state may provide separate services for:
- Residence Certificate
- Domicile Certificate
- Nativity Certificate
- Local Resident Certificate
- Permanent Resident Certificate
For example, Kerala's e-District service catalogue separately lists Residence Certificate, Nativity Certificate and Domicile Certificate among its certificate services. (India.gov.in)
The rule
Use the certificate name specified by the institution or scheme asking for it.
If an admission notification specifically requires a domicile certificate, don't substitute a generic residence certificate without checking.
Your document pouch
Exact requirements depend on the state and the purpose.
Common evidence categories can include:
Identity proof
Examples may include:
- Aadhaar
- PAN
- Passport
- Voter ID
- Driving licence
Use whatever the state portal's current checklist accepts.
Address / residence proof
Depending on the state, this may include:
- Aadhaar/address document
- Voter ID
- Utility bill
- Rental/lease document
- Property-related document
- Ration card
- Other government-issued residence evidence
Birth / age evidence
Where relevant:
- Birth certificate
- School certificate
- Board certificate
- Other accepted age document
Parent/family documents
For minors or applicants deriving residence status through parents, the portal may request:
- Parent's domicile/residence certificate
- Parent's identity proof
- Family relationship proof
- Parent's address evidence
Supporting declarations
Some jurisdictions may require:
- Affidavit/declaration
- Self-declaration
- Application undertaking
Don't prepare a random 20-document folder and upload everything. Follow the current official checklist.
Why one address proof may not be enough
Residence certification can involve more than asking:
“Where do you live today?”
The competent authority may need evidence relevant to the state's residence/domicile rules.
Delhi's official FAQ, for example, says educational certificates covering three consecutive years are considered but are not the only document considered for domicile issuance. (eDistrict Delhi)
That is why the correct document list must come from your state's current service instructions.
Step-by-step online application
1. Find the official service
Search your state government site for:
Domicile Certificate
or
Residence Certificate
or the terminology used by your state.
2. Register/login
Many e-District services require citizen registration.
The National Government Services Portal shows, for example, that West Bengal's local residence/domicile service requires registration. (India.gov.in)
Other services may have different login arrangements.
3. Select the correct service
Read the description carefully.
Don't accidentally select:
- Income certificate
- Caste certificate
- Nativity certificate
- EWS certificate
- Address correction
- General residence verification
These can be separate services.
4. Enter applicant details
Typical fields can include:
- Full name
- Date of birth
- Father's/mother's name
- Mobile number
- Current address
- Permanent/residential address
- District
- Taluk/tehsil/subdivision
- Duration of residence
Use the spelling appearing on your supporting documents.
The spelling rule
Suppose your Aadhaar says:
RAHUL KUMAR
and your school certificate says:
RAHULKUMAR
Don't casually create a third version:
RAHUL KUMAR REDDY
because the portal has a free-text field.
For certificates used in admissions and recruitment, consistent identity details reduce later verification problems.
Upload documents
Scan or photograph documents clearly.
Before uploading:
- Make all four corners visible
- Avoid glare
- Don't crop signatures/stamps
- Keep text readable
- Use the portal's permitted file format
- Stay within the file-size limit
Name files sensibly:
Aadhaar.pdf
Birth_Certificate.pdf
Address_Proof.pdf
Parent_Domicile.pdf
This makes later resubmission much easier.
Declaration / affidavit
If the portal asks for a declaration, read it before accepting.
A declaration may contain statements about:
- Residence
- Previous domicile
- Family details
- Accuracy of information
- Intended use
Don't tick a declaration merely because the portal won't proceed.
Pay only the official fee
Some states provide the service online and some may also provide assisted service through CSCs or other authorised channels. The Government Services Portal shows both fully online and assisted models depending on the jurisdiction. (India.gov.in)
If a portal shows an official fee:
Pay through the portal's payment mechanism.
Don't pay a random WhatsApp number because someone says:
“Government fee is ₹2,000.”
Ask for the official fee schedule.
Save the application number
Immediately after submission, save:
Application / acknowledgement number
Also save:
- Date of application
- Service name
- Applicant name
- Payment receipt, if applicable
- Uploaded documents
- Expected processing information displayed by the portal
Take a screenshot.
This becomes your reference if verification gets delayed.
What happens after submission?
The application may go through:
Submission
↓
Document scrutiny
↓
Verification
↓
Approval / rejection / query
↓
Certificate generation
↓
Download
The exact authority and workflow vary by state.
Some services may involve revenue officials or local verification.
If the application is sent back for correction
Don't immediately create another application.
Read the reason.
It may say something like:
- Document unclear
- Address proof insufficient
- Name mismatch
- Missing declaration
- Wrong jurisdiction
- Additional document required
Correct the specific issue through the portal's prescribed workflow where available.
If the portal says “pending”
Pending doesn't automatically mean rejected.
Check whether the application is:
- Awaiting scrutiny
- Awaiting field verification
- Awaiting officer approval
- Returned for clarification
- Awaiting applicant action
Use your acknowledgement/reference number when contacting the department.
Don't submit duplicate applications
This is a surprisingly common mistake.
If Application A12345 is pending, don't immediately submit A12346 because you're impatient.
Two applications can create:
- Duplicate records
- Conflicting information
- Additional verification
- Confusion about which certificate should be issued
First investigate the status of the existing application.
Download the certificate
Once approved, use the official portal's:
Download / Print Certificate
option.
Check:
- Name
- Date of birth
- Father's/mother's name
- District
- Address
- Certificate number
- Issuing authority
- Issue date
- QR/digital verification details, if present
Then save the PDF.
The PDF is not the end
Open the downloaded certificate and actually read it.
A certificate with one wrong digit in your date of birth can become a problem months later.
Don't wait until an admission portal rejects it.
Digital certificate vs printed certificate
Many government services provide digitally generated certificates that can be downloaded and printed.
Whether a particular college, employer or department accepts:
- Digital PDF
- Printed copy
- Digitally signed certificate
- QR-verifiable certificate
depends on its own instructions.
If an admission notification says “original certificate”, read the notification carefully rather than assuming a screenshot is sufficient.
Domicile for college admission
This is one of the most common reasons people suddenly need the certificate.
Before uploading it, check the admission notification for:
- State domicile requirement
- Cut-off date
- Required certificate format
- Issuing authority
- Certificate issue-date requirement
- Whether parent domicile is accepted
- Whether a residence certificate is acceptable instead
A perfectly genuine certificate can still be rejected if it doesn't meet the specific admission rule.
Domicile for government recruitment
Recruitment notifications can similarly specify:
- State/UT domicile
- Local candidate status
- Certificate format
- Issuing authority
- Cut-off date
- Required residence period
Don't rely on an old certificate without checking the current notification.
Moving to another state?
This is where people often confuse:
Current address
with
domicile status.
Moving into a state and changing your correspondence address does not automatically answer every legal question about domicile.
The applicable state rules and the purpose for which the certificate is being requested matter.
If you're applying after relocation, read the state's eligibility conditions carefully.
Children and students
A student may live in a hostel or rented accommodation in another city while maintaining a different family/permanent residence.
Don't automatically enter the hostel address as the domicile address.
Use the address and residence information the applicable state rules require.
If the certificate is being requested for a child, check whether the state requires parent/family documentation.
Rental-house residents
Owning property is not automatically the same thing as proving residence.
If you rent, keep relevant documents such as:
- Rent agreement
- Address proof
- Utility evidence
- Landlord-related documentation where specifically required
But upload only what the official service asks for.
Aadhaar is not a universal substitute
Aadhaar can be useful identity/address evidence in many government processes, but:
“I have Aadhaar with this address” ≠ “every institution must accept Aadhaar instead of a domicile certificate.”
If the application specifically requires a domicile certificate, obtain the certificate through the prescribed process.
Common mistakes
Choosing the wrong certificate
Residence, domicile and nativity can have different meanings.
Using an old document list
State portals change requirements.
Uploading blurry scans
A document that looks fine on your phone may be unreadable to the verifier.
Wrong jurisdiction
Choose the district/taluk/subdivision applicable to your application.
Name mismatch
Keep identity details consistent.
Duplicate applications
Check the existing application first.
Paying a private agent unnecessarily
Use the official portal or authorised CSC where available.
Waiting until admission week
Verification can take time.
The 15-minute pre-application check
Before opening the portal, make one folder containing:
Identity proof
Address/residence proof
Birth/age proof
Parent/family documents if applicable
Declaration/affidavit if required
Admission/recruitment notification
Then compare the folder against the current official document list.
That's much safer than starting the application first and discovering halfway through that one critical document is missing.
If you're applying for someone else
For parents, children or elderly relatives:
- Confirm the correct certificate type.
- Confirm the applicant's jurisdiction.
- Check the official document list.
- Prepare scans.
- Submit using the authorised account/process.
- Save the application number.
- Track status.
- Download and verify the certificate.
Don't share someone else's OTP with an unofficial agent.
Family document folder
For families that repeatedly apply for scholarships, admissions and government schemes, maintain a secure folder containing:
- Birth certificates
- Address proofs
- Existing domicile/residence certificates
- Income certificates
- Caste certificates where applicable
- Education certificates
- Application receipts
Keep the folder private and don't upload the entire collection to an unknown website.
If the certificate is rejected
Read the rejection reason first.
Then determine whether the issue is:
Eligibility
→ You may not meet the state's conditions.
Documentation
→ A required proof may be missing or inadequate.
Data mismatch
→ Correct the relevant record.
Jurisdiction
→ Apply through the correct authority.
Technical issue
→ Use the portal's grievance/helpdesk route.
If the authority has a formal appeal/review mechanism, follow that rather than submitting endless duplicate applications.
The simple workflow
Need domicile/residence proof
↓
Check exactly which certificate is required
↓
Find your state's official e-District/citizen portal
↓
Read eligibility + document list
↓
Prepare identity + residence + supporting documents
↓
Apply
↓
Save acknowledgement number
↓
Track
↓
Respond to any query
↓
Download certificate
↓
Check every detail
↓
Submit it to the college/employer/scheme
How NetaSampark helps
Domicile and residence certificates are state-specific government services, so the most important citizen habit is to start with the correct state portal rather than a random third-party website.
Use NetaSampark explore guides to understand the workflow, documents and terminology before you visit an e-District portal or CSC.
Be Informed. Be Heard.
Re-check before publishing: your state's current e-District/citizen-service portal, certificate name, eligibility rules, document list, fees and issuing authority. Requirements differ substantially across states; the National Government Services Portal itself lists separate state-specific domicile/residence services. (India.gov.in)